
Last updated November 18, 2026
 Hardwood
 Engineered hardwood
 Luxury vinyl plank
 Laminate
 Porcelain tile
 Carpet
 Shaw
 Mohawk
 COREtec
 Pergo
Free in-home measure and written estimate: Shaw, Mohawk, COREtec and Pergo lines compared on your own rooms, with carpet, tile, vinyl plank, laminate and hardwood laid out side by side
Get your free estimateSubfloors Explained: What Sits Under Your New Floor
Here’s a detail that surprises most homeowners: the floor you see is rarely the reason a floor fails. The layer underneath is. In Summerlin, where most homes sit on post-tension concrete slabs, that hidden layer decides whether a new floor settles in for decades or starts lifting, cupping, or squeaking long before it should. Many people shop for flooring by color and price and never ask a single question about what’s beneath it. We wrote this guide to change that. You’ll learn the vocabulary for subfloor conditions, the questions worth asking any installer, and how Summerlin’s construction and climate shape the answer.
Quick Answer
A subfloor is the structural layer beneath your finished floor. In Summerlin it’s usually a post-tension concrete slab on the ground level and plywood or OSB on second floors. That layer has to be flat, dry, and sound before anything goes down. When it isn’t, even premium flooring can fail. The material you choose matters, but the subfloor is the single biggest variable in whether the installation performs as designed.
Styles & brands we work with
- Hardwood
- Engineered hardwood
- Luxury vinyl plank
- Laminate
- Porcelain tile
- Carpet
- Shaw
- Mohawk
- COREtec
- Pergo
Table of Contents
- What Is a Subfloor, and Why Does It Matter More Than the Floor
- Concrete Slabs in Summerlin: Post-Tension Construction and Flatness
- Moisture Vapor Emission: The Test That Decides What Floor You Can Have
- Wood Subfloors in Summerlin Two-Story Homes: Plywood, OSB, and Deflection
- Old Adhesive, Tackstrip, and What They Do to Your Install Cost
- How a Bad Subfloor Voids a Good Warranty
- What a Proper Subfloor Evaluation Looks Like
- Matching the Subfloor Condition to the Flooring Product
What Is a Subfloor, and Why Does It Matter More Than the Floor
The subfloor is the structural surface that carries your finished floor. It’s separate from the underlayment, which is a thinner layer sometimes added for sound, cushioning, or leveling. Think of it in three layers: the joists or slab below, the subfloor itself, and then whatever underlayment the product calls for.
Most flooring problems we encounter trace back to one of these conditions being ignored. A floor can lift at the seams because the slab wasn’t flat. Planks can cup because moisture was rising from below. Tile can crack because the wood subfloor flexed. None of those failures are the product’s fault, and none of them show up on a color sample.
Here’s why this matters especially in Summerlin. The community’s ground-floor homes are overwhelmingly built on post-tension concrete slabs, a construction method common in Southern Nevada because it handles the region’s soils well. Post-tension means steel cables are tensioned inside the slab. That matters at the prep stage: you can’t just drill or cut into a post-tension slab the way you might on an older conventional slab. Any penetration has to be planned around the cable layout, which is why slab work on these homes belongs with someone who knows what they’re looking at.
The second reason is climate. Summerlin sits in the desert at elevation, with hot summers and very dry air. That swings the moisture picture in both directions: slabs can pull moisture from the soil beneath, while wood products can dry out and shrink during the low-humidity months. A subfloor conversation here has to account for both.
When we talk about a subfloor being “ready,” we mean three things are confirmed: it’s flat within the product’s spec, it’s dry enough for that particular material, and it’s structurally sound with no movement, crumbling, or loose sections. Those three checks are the foundation of everything else in this guide.
Concrete Slabs in Summerlin: Post-Tension Construction and Flatness
Flatness is the first thing we test on any slab. Not “level” in the sense of perfectly horizontal to the earth, but flat in the sense the flooring product requires. A slab can be slightly sloped toward a drain and still be perfectly flat for flooring. What flooring can’t tolerate is a wavy, dished, or humped surface.
Flatness is measured with a straightedge and a gauge, or with a laser level, and the result is compared to the tolerance the flooring manufacturer publishes. Different products tolerate different amounts of variation. That published tolerance is what your installer should be checking against, because it’s also what the warranty is keyed to.
When a slab is out of tolerance, there are two distinct fixes, and they solve different problems:
- Grinding removes high spots. It’s the right answer when the problem is a hump, a ridge at a patch, or a raised seam. Grinding doesn’t fix low areas.
- Self-leveling compound fills low spots and can bring a whole area up to a new flat plane. It’s the right answer for dips, dishing, and overall waviness. It’s not a fix for a structural problem, and it’s not a substitute for moisture testing.
Using the wrong one wastes money and can make the flatness worse. Grinding a dip, or pouring compound over a hump, leaves you with a surface that still doesn’t meet spec.
Post-tension slab construction adds a step that’s easy to skip. Before any grinding, cutting, or drilling, the cable layout has to be understood. Cables run in a pattern set at construction, and hitting one is a serious and expensive mistake. That’s why we treat slab penetrations as planned work, not improvised work. If your plan calls for anchoring anything into a Summerlin slab, that conversation needs to happen before the first tool comes out.
On the second floor of a two-story Summerlin home, you’re not on concrete. You’re on a wood subfloor, which we cover further down. It behaves completely differently and needs its own set of checks.
Moisture Vapor Emission: The Test That Decides What Floor You Can Have
Moisture vapor emission is water vapor moving up through a concrete slab from the soil beneath. It’s invisible and it’s constant. You can’t see it, smell it, or feel it on a dry day. It shows up later as cupped planks, lifted edges, failed adhesive, or a floor that just won’t stay put.
This is where a lot of Summerlin installations go wrong, because a visual inspection tells you nothing about it. The slab can look bone dry and still be emitting enough vapor to fail a flooring product. The only way to know is to test.
There are two accepted methods:
- Calcium chloride test (ASTM F1869). A measured dish of calcium chloride is sealed under a plastic dome on the slab for a set period. The dish absorbs vapor, and the weight gain is converted to an emission rate, expressed as pounds per 1,000 square feet per 24 hours.
- Relative humidity probe test (ASTM F2170). Probes are placed into drilled holes in the slab at a specified depth and left to equilibrate, then read for the relative humidity inside the concrete. This gives a percentage rather than an emission rate.
The two tests measure related but different things, and a product’s spec sheet will typically reference one or both. What matters for you is that your installer runs the test the product actually specifies, at the depth and conditions the method requires, and compares the result to the product’s published limit.
When the test comes back too high for the product you want, there are two broad paths. A vapor barrier or retarder is a membrane intended to block or slow vapor from reaching the flooring. A moisture-mitigation membrane is a different tool, designed to handle a higher level of emission or to serve as part of the flooring system itself. These aren’t interchangeable, and the choice depends on the measured number, the product, and the manufacturer’s instructions.
This is the part of the job where the honest answer is sometimes “not this product, not yet.” We’d rather tell you that before installation than have you call us back about a lifted floor later. It’s also where having access to nine industry-leading brands helps. Shaw, Mohawk, COREtec, Pergo, LifeProof, Mannington, Armstrong, Daltile, and Karndean all publish their own moisture limits, and the practical range across those products is wide. Nine brands, one conversation, and a product that actually fits your slab.
Wood Subfloors in Summerlin Two-Story Homes: Plywood, OSB, and Deflection
Second floors in Summerlin’s two-story homes typically sit on plywood or oriented strand board (OSB) over wood joists. Both are common, and both can perform well. They fail differently, though, and each has its own set of checks.
Plywood versus OSB. Plywood is made of crossed veneer layers and tends to hold up to edge fastening and re-fastening well. OSB is made of compressed strands and is a solid, consistent panel, but it can be less forgiving when a fastener pulls loose or when an edge swells from a past leak. Neither material is a problem on its own. What matters is condition: soft spots, delamination, swelling, or movement between panels.
Deflection. Deflection is how much a floor structure bends under load. Too much flex and the finished floor cracks or separates, especially tile and grout. Ceramic and porcelain tile installs need a stiffer floor than carpet or resilient products. The standard reference point in the trade is L/360, the minimum deflection many tile manufacturers publish; the exact figure for your product is the one that counts, and your installer should be checking against the product’s published spec, not a rule of thumb. If the floor fails that check, the fix is reinforcement, not a heavier underlayment.
Squeaks. Squeaks come from movement, usually between panels or between panels and joists. They’re a symptom, and a floor installed over an unresolved squeak will usually find a way to squeak again. Tightening the subfloor, adding fasteners, or addressing a specific loose panel is the fix at the source.
What a floated floor does and doesn’t fix. A floated floor rests on an underlayment and doesn’t attach to the subfloor. That makes it more forgiving of minor flatness variation than a glued or nailed product. It does not fix a moisture problem, it does not fix deflection, and it does not fix a soft spot. It can also telegraph a hump or dip if the subfloor wasn’t corrected first. In a dry climate like Summerlin’s, floated floors also need room to expand and contract with the seasonal humidity swing, which is why the perimeter gaps called for in the product instructions are not a detail to skip.
Old Adhesive, Tackstrip, and What They Do to Your Install Cost
When you pull up an old floor to install a new one, you rarely get a clean subfloor. You get the ghost of the old one: adhesive residue from a previous vinyl or glue-down floor, staple holes, tackstrip nails, and sometimes a patch that’s no longer flat.
Old adhesive is the one that costs the most.
- Flatness. Adhesive residue that’s built up in ridges or left uneven raises the surface. A new floor laid over it will show the ridges, and the flatness check will fail. The residue has to be removed or the surface has to be resurfaced before you can honestly call the subfloor ready.
- Bond. A new adhesive or mortar needs a clean, sound surface to grip. Old residue that’s loose or contaminated can keep the new floor from bonding properly.
- Time. Removing adhesive is labor. It’s often the single biggest difference between a fast install and a slow one, and it’s why an estimate done by eye can come back higher than expected. A proper estimate looks at the subfloor before it sets a price.
- Filling holes from tackstrip and staples. Tidy, but not free. In the same room, this is minor next to adhesive removal, but it’s part of the prep line.
Filling, patching, and grinding all get priced into the written estimate, and that estimate is the final word on what the job costs. This is also why we prefer to see a subfloor before quoting a material swap. A room that already had a glue-down floor is a different job than an empty slab, and you deserve to know which one you have.
If this is a whole-home project with carpet coming out of one room and tile going into another, that’s where having a single-source flooring contractor helps. Carpet and tile have different subfloor requirements, and one evaluation can inform both. You can read more about our approach on the Flooring Installation Summerlin page.
How a Bad Subfloor Voids a Good Warranty
Here’s a pattern we see repeated: a homeowner buys a well-regarded product, the product performs for a while and then fails, and the warranty claim goes nowhere. The reason is almost never the product. It’s that the installation didn’t meet the subfloor conditions the manufacturer publishes.
Every major manufacturer publishes installation requirements: flatness tolerances, moisture limits, deflection minimums, and substrate preparation. Those requirements are part of the warranty, not a suggestion. If a floor is installed over a slab above the product’s moisture limit, or on a wood subfloor below the deflection minimum, the manufacturer has a documented reason to deny the claim.
The practical takeaway: get the subfloor specs in writing at the estimate.
- Ask for the flatness tolerance the product requires and the measurement taken on your floor.
- Ask which moisture test was run, at what depth, and what the result was compared to the product’s limit.
- Ask what deflection standard the product requires and how your floor measures against it.
- Ask what prep work is included in the written estimate, so there are no surprises later.
If a contractor can’t answer those questions for a product like Karndean or Armstrong, that’s worth knowing before the floor goes down. Our own approach is to test first and recommend second. We install it, so we know what performs, and we’d rather match you to a product your subfloor can support than sell you something that fights it.
The good news is that a subfloor that’s out of spec isn’t a dead end. It’s a conversation about mitigation, product selection, and cost, and it belongs in the estimate, not in a claim a couple of years later.
What a Proper Subfloor Evaluation Looks Like
An evaluation isn’t a quick tap on the floor and a nod. Here’s what a thorough one covers. If you’re comparing contractors, this is the sequence to ask about.
- Identify the subfloor. On a Summerlin ground floor, that means confirming a post-tension slab and understanding the cable layout. On the second floor, it means identifying plywood or OSB and checking for swelling, delamination, or soft spots.
- Run a flatness check. Straightedge and gauge or laser level, compared to the tolerance of the product you’re considering. High spots and low spots get noted separately, because they get different fixes.
- Run a moisture test on the slab. Calcium chloride or RH probe, matched to the method the product’s spec sheet references, with the result compared to that product’s limit.
- Check deflection on wood subfloors. Compared to the product’s published requirement, especially for tile and stone.
- Look for movement and squeaks. Loose panels, missing fasteners, and evidence of past water issues.
- Inventory what’s already there. Adhesive residue, tackstrip, staples, patching, and anything else that will affect prep time.
- Put the prep in the written estimate. Grinding, leveling compound, priming, patching, and barrier or membrane all named, so the price reflects the actual job.
None of this is exotic. It’s routine work for someone who does it regularly, and it takes less time than the aftermath of skipping it. The evaluation is also where the right product gets chosen, and that’s where breadth in the portfolio matters. Mannington, Karndean, Daltile, LifeProof, and the rest all publish their own specs. Knowing which one fits your slab is part of the value of the visit.
Matching the Subfloor Condition to the Flooring Product
Once you know your subfloor conditions, product selection gets more concrete. The three main flooring disciplines each ask something different of the subfloor.
Carpet. Carpet is the most forgiving finished floor over imperfect substrates, which is one reason it remains common in bedrooms. A subfloor that’s slightly uneven can still take carpet well, provided the surface is sound and the installation method is right. That said, a soft spot or a loose panel will telegraph through, so the subfloor still gets checked. To learn more about that path, see our carpet installation page.
Tile. Tile is the least forgiving. It needs a flat surface and a stiff floor, and it needs to be bonded properly. On a slab, that means confirming flatness and moisture. On a wood subfloor, that means confirming deflection and using the right underlayment for the product. When tile is confirmed by the subfloor conditions, it’s a durable, long-term choice. Our tile flooring installation page covers how we approach those conversations.
Wood and resilient. Hardwood and the resilient brands (COREtec, Karndean, LifeProof, Pergo, Shaw, Mohawk, Armstrong) each publish their own moisture and flatness limits. Because they differ, a subfloor that rules out one product may be a straightforward job for another. This is where a single-source flooring contractor should be able to offer true alternatives rather than steer you toward whatever is on the floor that day.
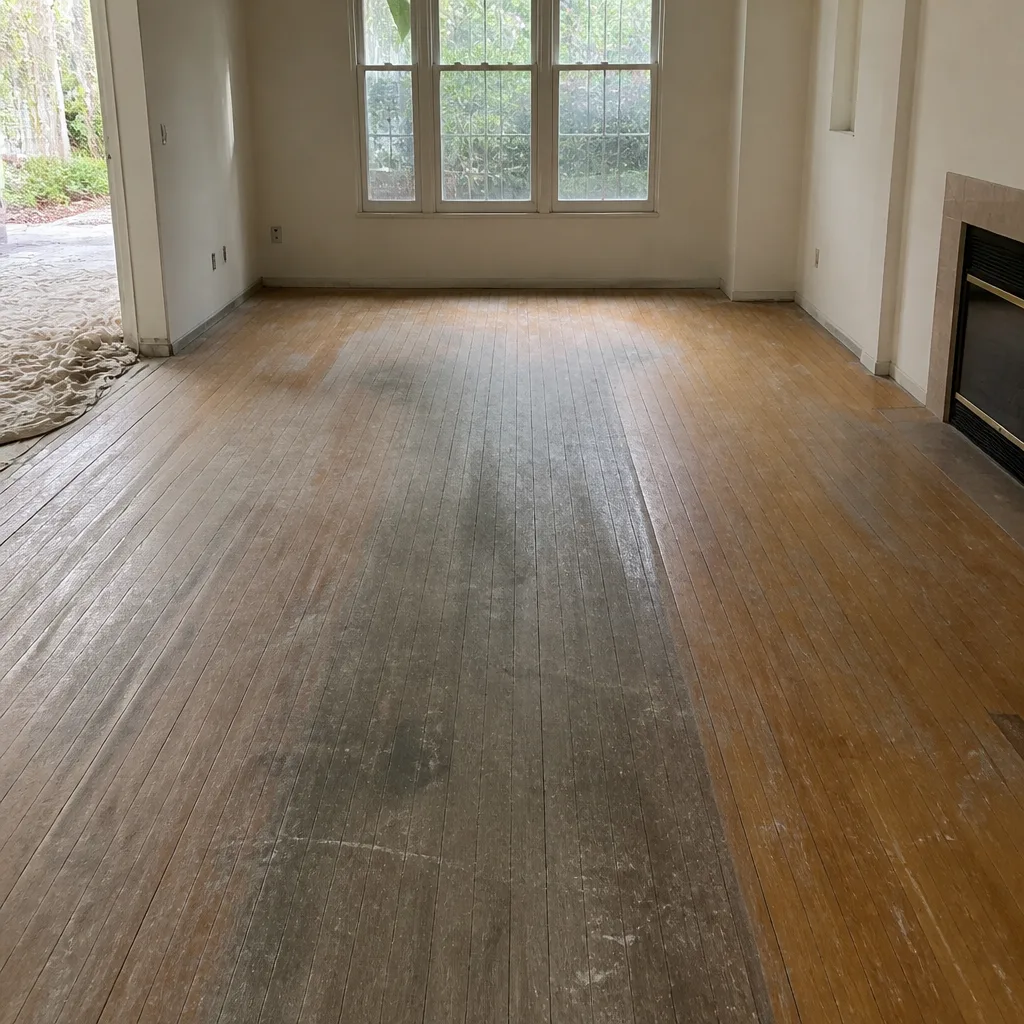
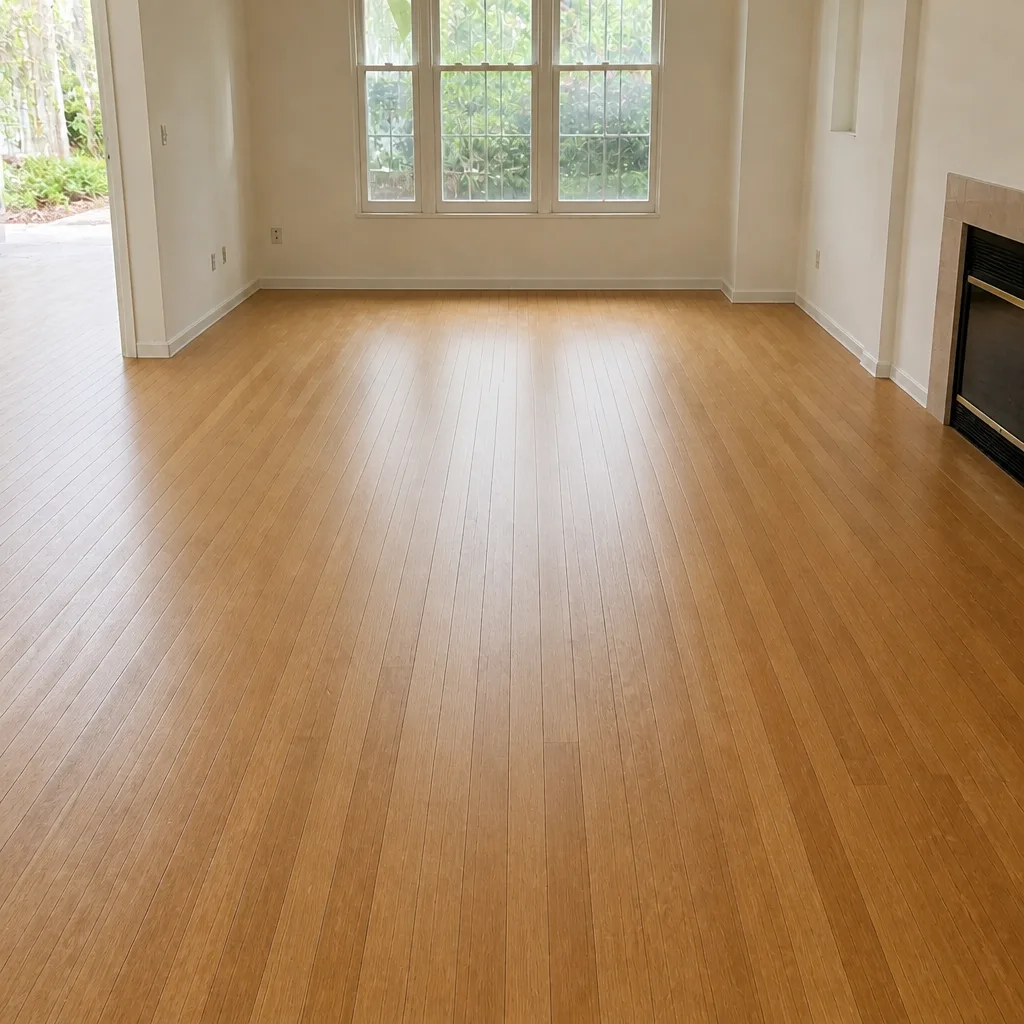
Refinishing existing hardwood. Before replacing an old wood floor, it’s worth asking whether it can be refinished. Sanding, staining, and finishing a floor that’s structurally sound can be a better answer than putting a new floor over it, and it’s work most flooring installers don’t perform. The subfloor still gets inspected, but the decision changes. It depends on the thickness of the wood and its condition, checked at the estimate visit. We’d rather keep a good floor alive than cover it up.
With nine brands and three disciplines on the table, the clearest way to choose is to start with the room and the subfloor, then narrow the product. If you’re comparing neighborhoods, the goal is the same in Green Valley or Sandy Valley: confirm what’s under the floor before you choose what goes on top.
Common Mistakes to Avoid
- Skipping the moisture test. A slab that looks dry can be emitting vapor at a level that will lift a floor. Spend the time on the test now.
- Grinding a dip or leveling a hump. These are two different problems with two different fixes. Mixing them up can leave you with a worse surface than you started with.
- Trusting a visual flatness check. A straightedge is the tool; the eye isn’t. Tile failures from flexed wood subfloors almost always trace back to a check that wasn’t done.
- Assuming a floated floor fixes everything. It tolerates minor flatness variation. It doesn’t cure moisture, deflection, or soft spots.
- Laying new flooring over old adhesive. Residue that raises the surface or contaminates the bond will cost more to fix later than to remove now. It also should be part of the written estimate, not a surprise.
- Not asking for the product’s published specs. Flatness, moisture, and deflection limits belong in the conversation before you commit. Without them, the warranty is harder to claim.
- Drilling into a Summerlin post-tension slab without planning for the cable layout. It’s not a detail. Ask before the first hole is made.
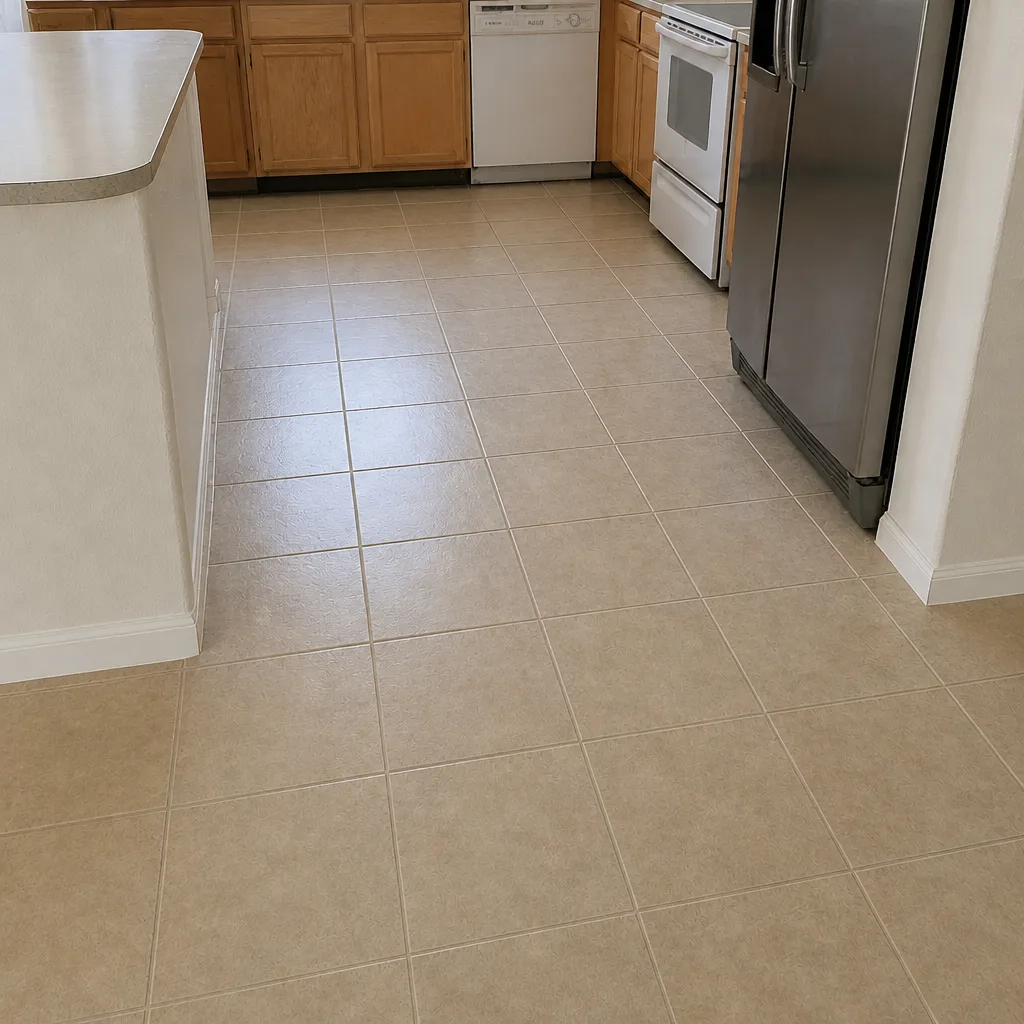
See the difference
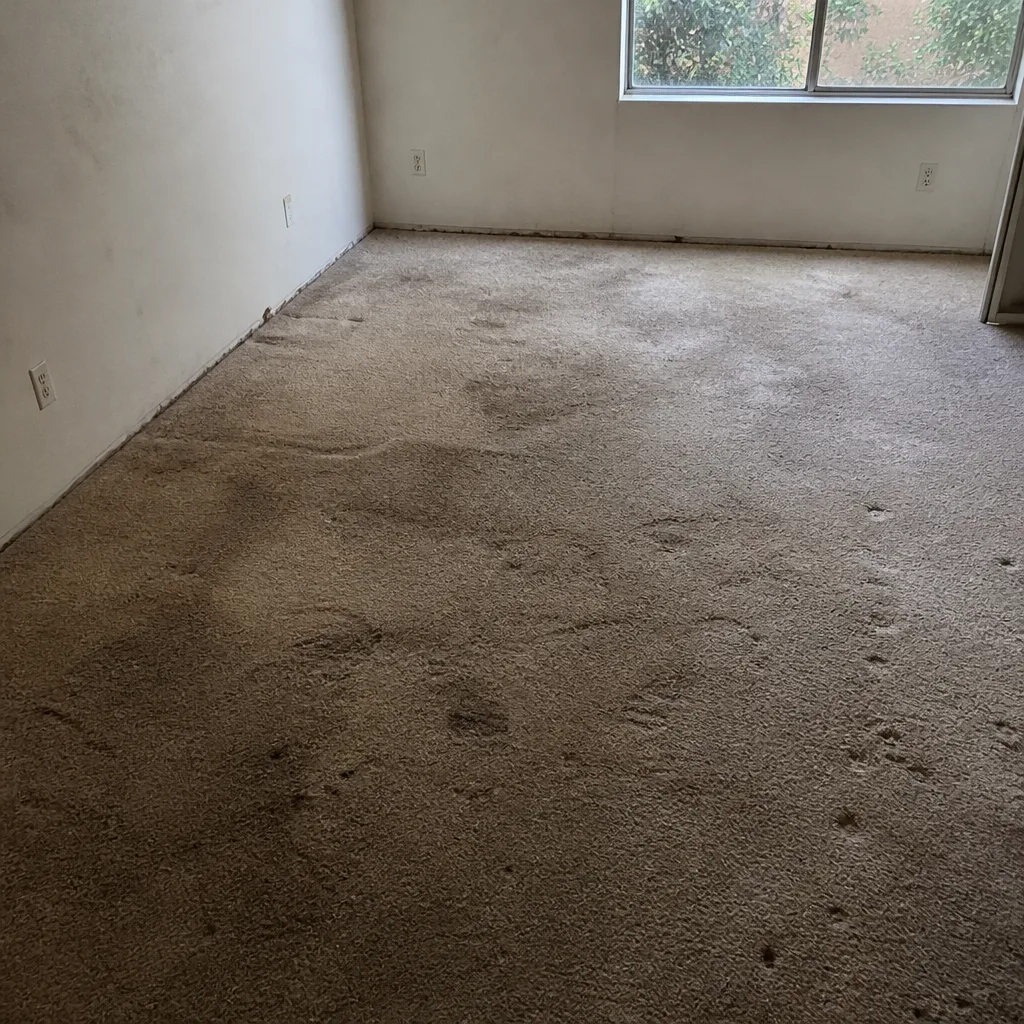 Before
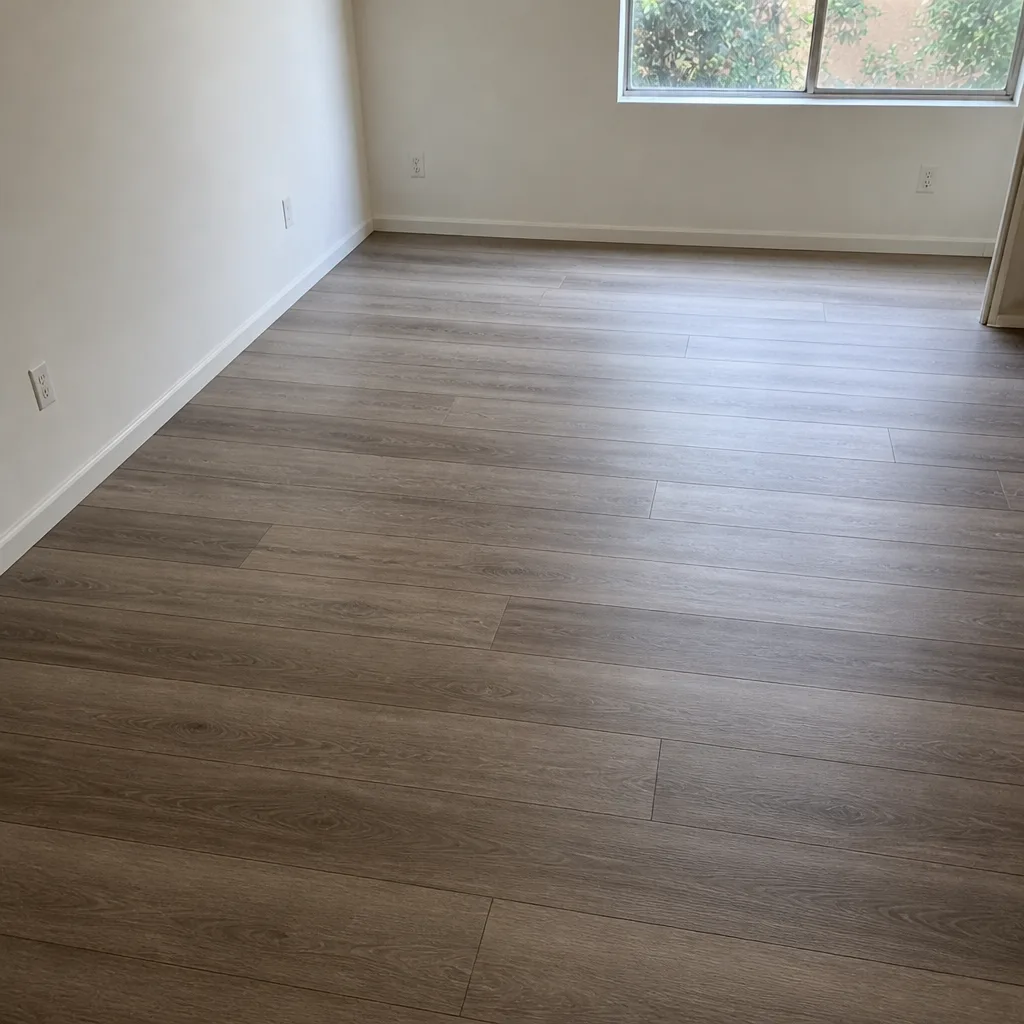 After
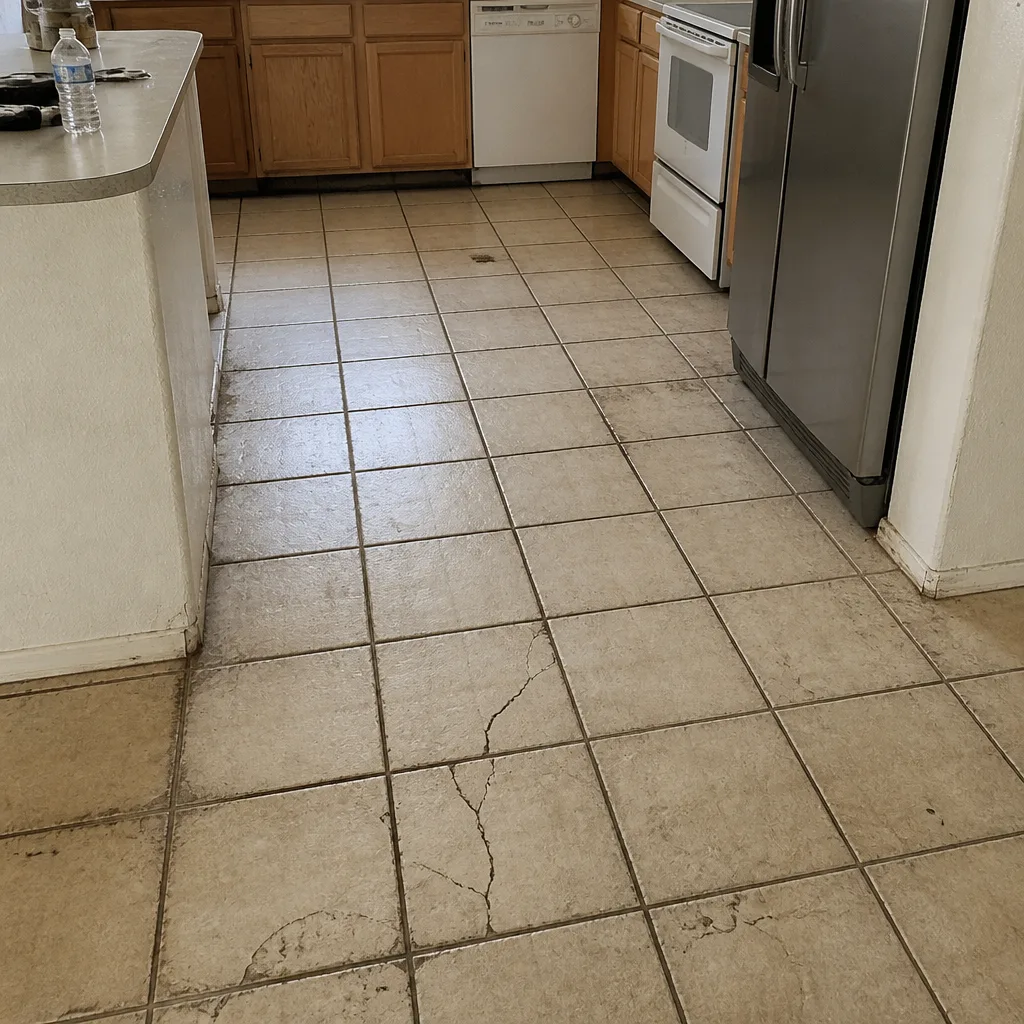 Before
 After
 Before
 After
When to Call a Professional
Call a professional if any of these describe your situation: you’re planning tile on a second-story wood subfloor, you’ve seen cupping or lifting on a floor that’s already down, you’re installing over a slab and don’t have a recent moisture test, you’re pulling up an old glue-down floor, or you have a post-tension slab and a plan that involves drilling or anchoring into it. In any of those cases, the subfloor should be evaluated before the product is chosen, not after. Our technicians have up to 9 years of experience reading subfloor conditions and matching products to them. Flooring Installation Summerlin offers free estimates in Summerlin and the surrounding community. Call (844) 320-7082 to schedule yours.
Frequently Asked Questions
Three checks confirm it: flatness within the product’s published tolerance, moisture within the product’s limit, and structural soundness with no movement or soft spots. All three are measurable, and the results should be written down for your records. Anything less is a guess.
Summerlin’s ground floors are commonly post-tension slabs, and that changes what a contractor can and can’t do during prep. Planned penetrations, cable layout awareness, and a proper moisture test are all part of a correct install. It’s not a reason to avoid anything. It’s a reason to ask the question.
It depends on the product. Each manufacturer publishes its own tolerance, and that number is the one that counts for your floor and your warranty. The subfloor is checked with a straightedge and gauge against that number, not against a guess.
Only after the residue is dealt with, not as a shortcut. Adhesive that’s built up on the surface can fail the flatness check and contaminate the bond, so removal or resurfacing is usually required. It adds labor, which is why a proper estimate looks at the subfloor first.
Not always. A barrier or retarder has a range of conditions it can handle, and a product that measures above that range may need a moisture-mitigation membrane, or a different flooring product altogether. The decision follows the test result and the product’s published limit.
Yes. The estimate visit and the subfloor evaluation are free, and the written estimate you receive is the final price for the job. Call (844) 320-7082 to schedule your free estimate. Estimates are free, and there’s no obligation.
The Bottom Line
The subfloor isn’t the part of your project anyone gets excited about. It’s the part that decides whether the part they do get excited about works. Flatness, moisture, and structural soundness are the three questions that matter, and every one of them has a test and a published spec. Summerlin’s post-tension slabs and dry climate shape the answers, which is why the evaluation has to happen before the product is chosen, not after. Get the specs in writing, match the product to the floor you actually have, and ask your contractor the questions that make them show their work.
Call (844) 320-7082 for a free estimate. We answer 24/7. Fast dispatch from 7am to 7pm, Sunday through Friday.
Written by the team at Flooring Installation Summerlin.